Imagine waking up, rolling out your mat, and flowing through a Pilates session without leaving your home. A dedicated home Pilates studio offers convenience and a personalized touch to your workouts. It’s no wonder Pilates is surging in popularity – as of 2023, nearly 12 million Americans practice Pilates (about 15% more than the year before). Many enthusiasts have embraced at-home practice, especially after recent years prompted more home fitness; sales of Pilates reformers and accessories climbed during the pandemic and continue to grow as people equip home studios. Whether you’re a beginner starting with just a mat or an experienced practitioner looking to bring studio-grade equipment home, you can create a Pilates space that fits your goals, budget, and living area. This guide will walk you through the essentials of a home Pilates studio setup – from planning your space, choosing affordable Pilates equipment, and small-space solutions, to design ideas for a calming ambiance. Let’s get started on designing your own Pilates haven!

Planning Your Home Pilates Studio Space
Start with a plan: Before buying any equipment, evaluate where in your home you can dedicate a Pilates area. Ideally, choose a quiet spot where you won’t be disturbed – this could be a spare bedroom, a section of your living room, or even a cleared area in a home office. Make sure the location allows you to fully focus on your practice (a door or room divider for privacy can help). If possible, pick a space with good ventilation and natural light, as it can enhance the atmosphere.
Space and layout: You don’t need a huge room; Pilates can be done in surprisingly compact areas. For mat workouts, you’ll want roughly the footprint of a yoga mat plus a little extra room to stretch your arms and legs in all directions (think about 6–8 feet long and a few feet wide of clear floor space). That is usually enough for mat exercises and small props. If you’re planning to use larger apparatus like a reformer, you’ll need more room – a full-size reformer is typically around 7–8 feet long and 2–3 feet wide. A good rule of thumb is to allow at least a 10 ft x 10 ft area (about 100 square feet) for a reformer, with about 2 feet of clearance on each side for comfortable movement. This ensures you can perform exercises at the ends of the reformer and get on/off safely. (For bigger studio-style reformers with towers, you may need even more space, e.g. 10 x 12 ft or more.) Measure your available area and compare it to the equipment dimensions before you buy.
Flooring: Check the surface of your chosen spot. Pilates can be done on hardwood, carpet, or tile, but you’ll want a supportive, non-slip base. A good Pilates mat will provide cushioning on a hard floor. If you’re setting up on carpet, ensure it’s not too thick or unstable (a very plush carpet could make a reformer less stable). For heavy equipment like reformers, a solid floor is ideal. You might place a thin protective mat under the reformer feet to protect flooring and prevent any slipping. The goal is a firm, level surface for safe practice.
Plan your layout: Think about how you will arrange everything in the space. Allow clearance for moving around the mat or equipment. If using a reformer or other large apparatus, position it such that you can access it from all sides if possible. It helps to mark out the dimensions on the floor with tape before committing, to visualize how it fits. Also consider where you’ll store smaller props (we’ll cover storage ideas later). Keep the area around your Pilates zone clutter-free to avoid tripping hazards and to foster a focused vibe. Remember, even if you’re carving out just a corner of a multipurpose room, defining that area (with a rug or mat) can psychologically set it apart as your “studio.”
What Do You Need for Pilates at Home? Essential Equipment & Gear
One of the best parts of Pilates is that you don’t need huge machines to get started – in fact, you can build a Pilates home gym on a modest budget. Let’s break down the Pilates essentials first, and then explore the bigger equipment for those who want to go further. Whether you’re wondering what do you need for Pilates at home or looking to upgrade your setup, this section will help you choose the right gear.
Mat & Small Props: Pilates Essentials on a Budget (Under $500)
You can have an effective at-home Pilates studio with just some basic, affordable Pilates equipment. Here are the key essentials for a beginner-friendly setup:
- Pilates Mat: A quality mat is a must. Pilates mats are typically thicker than standard yoga mats (around 1/2 inch) to cushion your spine during rolling exercises. Look for one that is non-slip and long enough for your height. A good mat might cost $50–$100, but it’s the foundation of your home studio. If you’re on a tight budget, even a standard exercise mat will do to start.
- Resistance Bands: Simple resistance bands or tubes can add challenge to your mat exercises. They’re inexpensive and versatile – use them for arm stretches, leg presses, or assisted stretching. Resistance bands (or a Pilates resistance band set) often cost $10–$30.
- Pilates Ring (Magic Circle): This lightweight ring (usually ~$30–$50) is a classic Pilates prop to target inner thighs, arms, and core. You squeeze the ring between your hands or knees to engage muscles. It’s fantastic for adding intensity without big equipment.
- Light Weights or Toning Balls: A pair of 2–5 pound dumbbells or sand-filled toning balls can be used for arm work and adding resistance to exercises. These typically run $20–$40. They’re optional but useful for building strength gradually.
- Stability Ball: Also called an exercise ball, this large inflatable ball (around $20–$40) is great for core workouts and stretching. You can lie on it for support or use it to challenge your balance in certain moves. If you have room, it’s a fun addition (choose a size that fits your height, usually 55–65 cm diameter).
- Foam Roller: A foam roller (around $30) can be used for balance exercises and for self-massage/myofascial release after your workouts. It’s excellent for rolling out tight muscles and improving flexibility.
All of the above essentials can typically be acquired for well under $500 total, especially if you shop around. These items are the core of an affordable Pilates equipment setup. With just a mat and a few props, you can perform a vast range of Pilates exercises at home. In fact, the classical Pilates mat repertoire uses only your bodyweight and maybe a ring – so don’t worry if your budget is minimal. Start with the basics and add on as you go. Consistency matters more than owning every gadget. Many people are surprised by how challenging mat Pilates alone can be!
Choosing quality: When selecting these items, opt for decent quality if you can (they’ll last longer and feel better in use). For instance, a thicker high-density mat won’t slide around and will provide better support than a flimsy bargain mat. Similarly, look for resistance bands that won’t snap easily. That said, you don’t have to buy the most expensive brands. There are plenty of mid-range options that are durable. Our guide on choosing the right Pilates equipment (including mats and accessories) offers more tips on what to look for in quality gear. Start with the essentials you need now, and remember you can always expand your collection over time.

Reformers and More: Upgrading to a Studio-Grade Home Pilates Gym
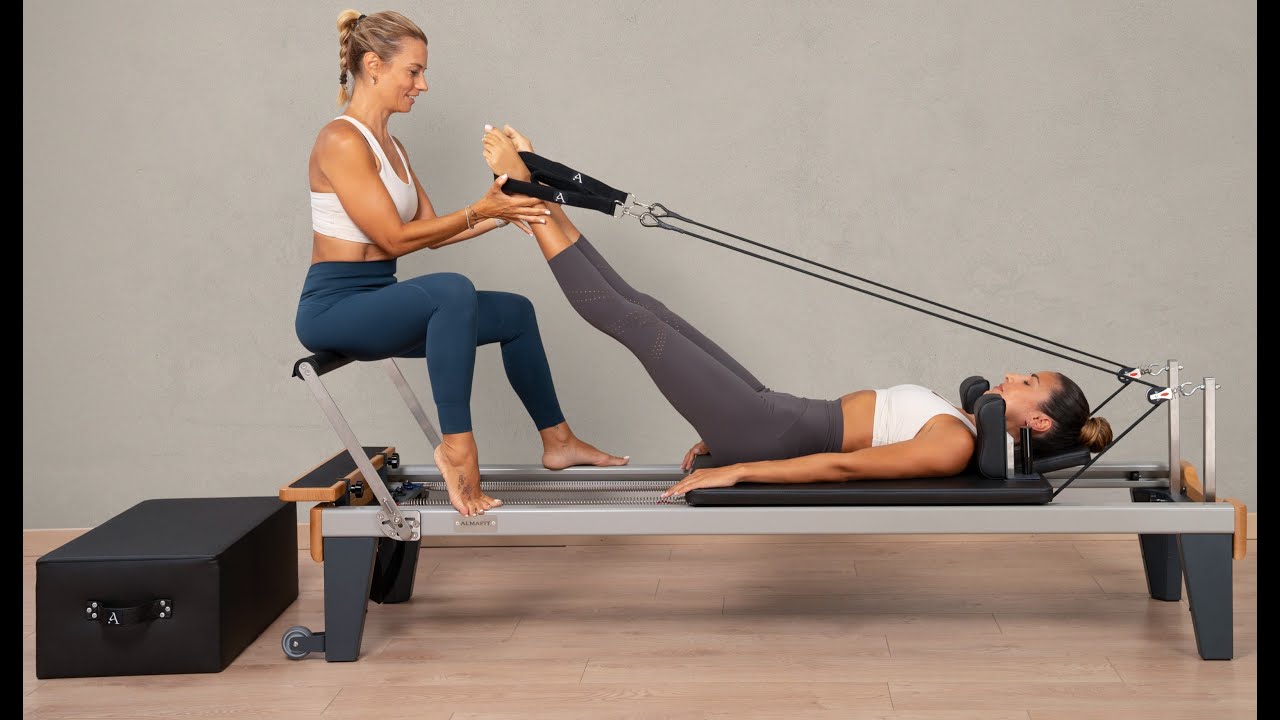
As you progress in your practice, you might be tempted to recreate the full studio experience at home. The centerpiece of a professional Pilates studio is the Pilates reformer – a sliding carriage bed with springs for resistance. Owning a reformer isn’t necessary for a great workout, but it can dramatically expand your exercise options and take your training to the next level. Here’s what to consider before you invest in larger equipment:
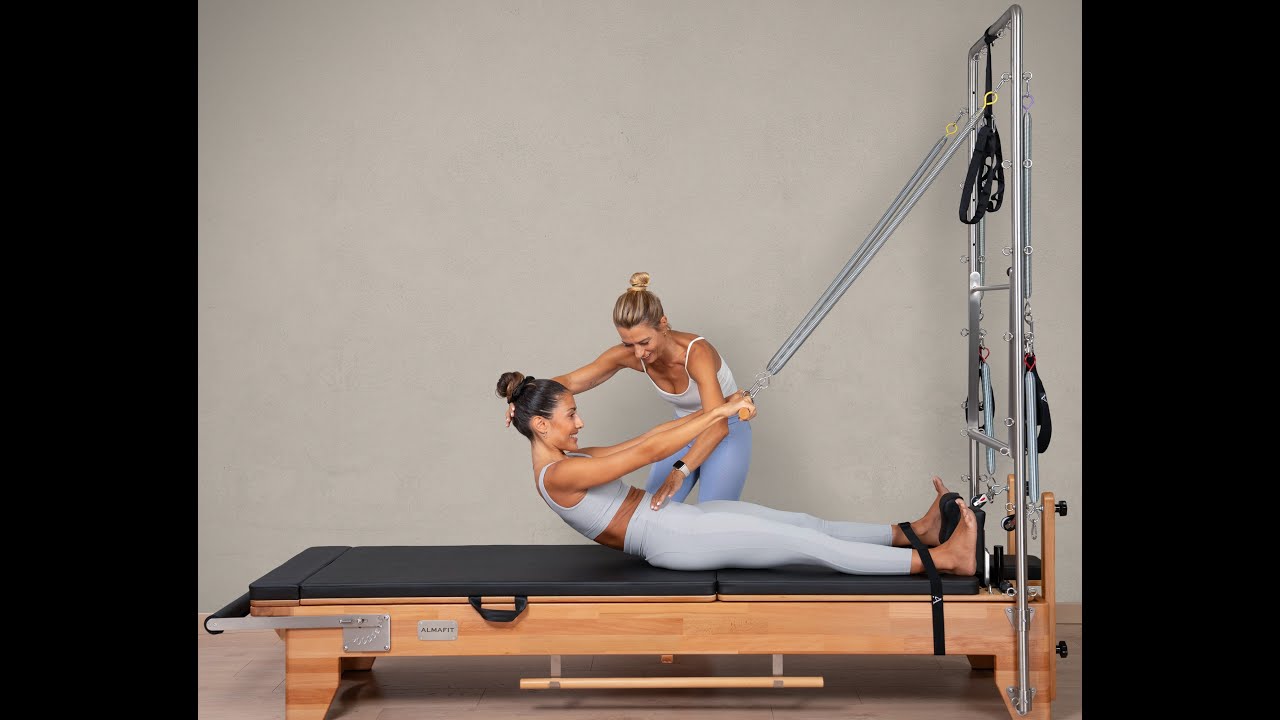
The Pilates Reformer: A reformer allows you to perform hundreds of exercises with adjustable resistance, targeting every muscle group with low impact. There are home models designed to be more affordable and space-friendly than the heavy studio reformers. If you’re a devoted Pilates enthusiast (or you’ve been taking reformer classes and want to stop paying studio fees), purchasing one can be a game-changer. Keep in mind, quality reformers are a significant investment – expect prices roughly in the $2,000 and up range for a reliable, smooth-gliding unit. It truly is an investment in your health and training. In fact, many practitioners find that owning a Pilates reformer is a worthwhile investment for long-term progress and motivation. With your own reformer, it’s like having a whole Pilates studio in your home – you’re not just buying equipment; you’re “investing in a healthier, more balanced lifestyle… it’s time to stop renting your fitness and start owning it,” as we like to say at Almafit!
Space and setup for reformer: Before buying a reformer, ensure you have the needed space (refer back to the room size guidelines in the planning section). Some home reformers are designed to be foldable or stored upright when not in use, which is a huge plus if you have a small space. For example, Almafit’s Aion reformer can be stood upright to free floor space after your session. If you’re tight on room, look for models with this feature. Also, consider the assembly and installation: reformers will arrive disassembled. But don’t let that intimidate you – they typically come with clear instructions, and we provide assembly user guides to help you set up your equipment safely at home. You may want a second person to assist in moving or assembling it due to the weight. Once it’s built and in place, you’ll have a versatile machine for exercises like footwork, leg circles, arm work with straps, and more advanced moves that aren’t possible on the mat alone.
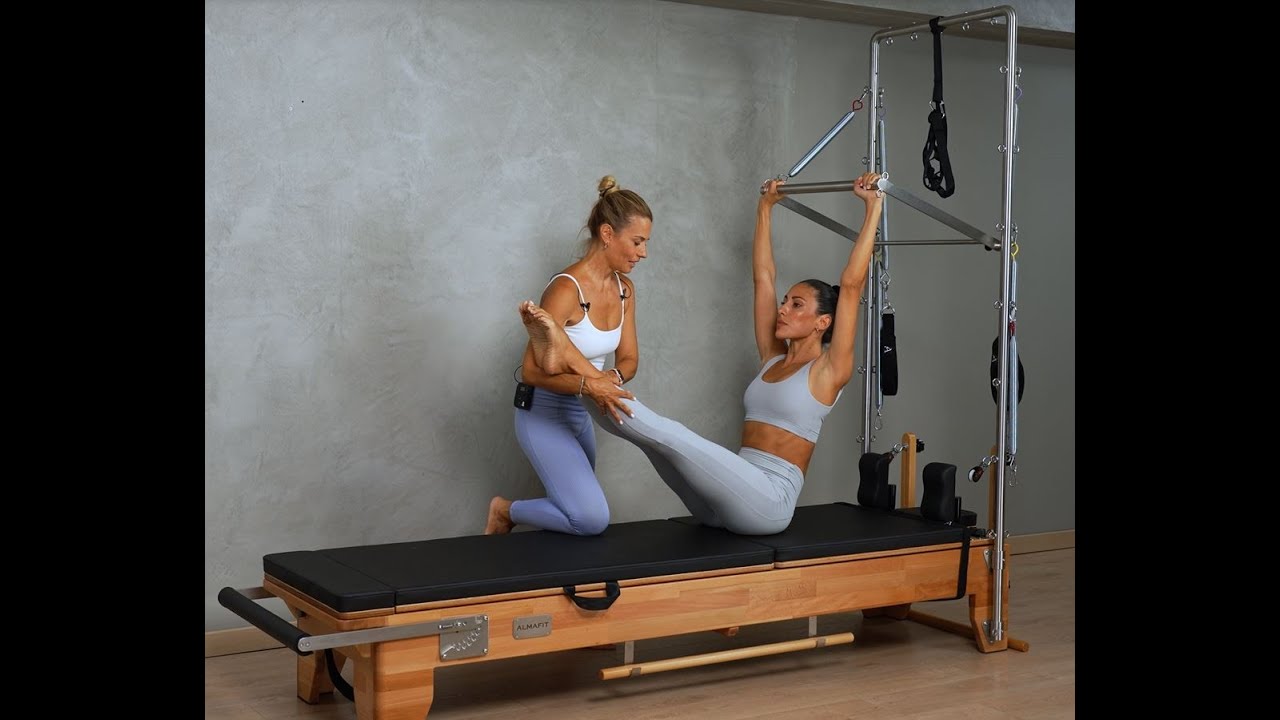
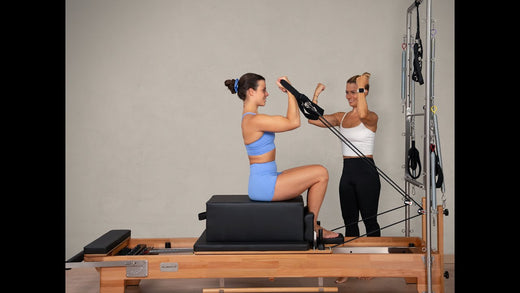
Other studio apparatus: Beyond the reformer, Pilates studios use equipment like the Chair, Cadillac (Trapeze Table), Ladder Barrel, etc. It’s generally not practical for most home studios to have all of these due to cost and space. However, some dedicated home practitioners do add one or two smaller apparatus: for instance, a Pilates Chair (Wunda chair) is a compact piece that offers a great strength workout and has a footprint much smaller than a reformer. There are also wall-mounted systems (like a springboard or tower that attaches to a wall) which can mimic some Cadillac exercises without taking up much room. If you have limited floor space, a wall unit could be an interesting option. That said, these additions are totally optional. Most people will be very well served with a mat + props, and perhaps a reformer as the big-ticket item if desired. If you’re considering any big apparatus, be sure to research and ensure it fits your goals. For instance, if your aim is to increase core strength and you love the reformer from class, that’s a strong case to get one at home. But if you’re more casual, you might stick to the basics for a while.
Budget tiers: To summarize budgets: You can set up an at-home Pilates studio for roughly $300–$500 by focusing on matwork and a handful of props (mat, bands, ring, etc.). This is the best route for beginners or those short on space and funds. You’ll be able to accomplish a lot with that humble setup. On the other hand, if you’re committed to a studio-grade experience, be prepared to spend $2,000+ on a quality reformer (and potentially more if adding extras like a tower or barrel). There are cheaper reformer models out there, but be cautious – cheaper units may have shorter beds or less smooth mechanisms, which can affect your experience. It’s worth saving up for a reputable model if you decide to go this route, as a well-built reformer will last years (and save you money on studio classes in the long run). Think of it as investing in your own health club at home. You might start with the basics now and plan for a reformer later; many people upgrade their home Pilates studios over time as their practice deepens.

Small Space Pilates Studio Solutions
Worried you don’t have an entire room to devote to Pilates? Fear not – you can still create a functional Pilates home studio even in a tight space. Here are some smart solutions for setting up a Pilates studio in a small area, such as an apartment or multi-use room:
- Multi-purpose space: Your Pilates “studio” doesn’t have to be a separate room. It can be a section of your bedroom or living room. The key is to delineate that area for your workouts. For example, lay down your mat in a corner that has a bit of open floor. Communicate with family/roommates about your workout times so you get that zone to yourself when needed. A folding screen or curtain can help section off the space or provide privacy if desired.
- Foldable or upright storage equipment: When square footage is limited, choose gear that tucks away easily. Many small props already store compactly in a bin or closet. For larger equipment, consider a reformer that folds or stands upright. Some home reformers can be propped against a wall or rolled under a bed when not in use, drastically reducing their footprint. This means you can have a reformer even in a one-bedroom apartment – just fold it up after your session. Always follow the manufacturer’s guidelines for safe storage (engage wheel locks, etc., if applicable).
- Use vertical space: Think upwards! Install wall hooks or shelving to store your props. Hang resistance bands on a hook, keep your Pilates ring on a wall-mounted rack, or place a small shelf for items like balls and rollers. A tall bookcase or storage tower can also hold mats and towels. By storing gear vertically, you free up floor space and keep things organized. Some people even mount a foldable ballet barre or springboard on a wall, which takes zero floor space when not in use (great for adding barre or tower exercises later).
- Smart storage furniture: If your Pilates area is part of a living space, use furniture that doubles as storage. For example, a storage ottoman or bench can hide your bands, weights, and rings inside when not in use – and serve as seating or a table the rest of the time. Baskets or decorative boxes can stash props and slide onto a shelf. Keeping your equipment out of sight when not exercising will maintain the room’s normal look and prevent clutter.
- Mat alternatives for small spaces: If even a full-size Pilates mat is a tight squeeze, you can use a fold-up travel mat or a Pilates towel on a carpet. Some mats can be rolled up and tucked in a corner easily or hung behind a door. You could also consider an interlocking foam floor tile that you assemble for workouts and then stow away. The idea is to have a comfortable surface for exercise that doesn’t permanently take over your limited floor area.
- Mirror effect: Adding a wall mirror or an over-the-door mirror can work wonders in a small Pilates space. Mirrors create the illusion of a larger room and also let you check your form during exercises (just like in a professional studio). A mirror doesn’t take up floor space, and it brings more light and depth to a cramped area. It’s a small-space essential for many home gyms.
Remember, building a Pilates studio is about optimizing what you have. Even if you only have a 6-foot by 6-foot corner available, that’s enough for a mat and a few props. Many people in city apartments have managed to create pilates home studios in a nook by simply being creative with storage and layout. The key is to keep the area dedicated (even if it’s a shared room, mentally designate that corner for Pilates). Put away equipment after use so the space doesn’t feel crowded. By using vertical storage and choosing compact equipment, you can make an at-home Pilates studio feasible in the smallest of spaces. As one design expert noted, incorporating smart storage solutions ensures your home gym flows with the rest of your decor – meaning you don’t have to sacrifice style even if your Pilates area is in the living room. Coming up next, we’ll talk about making your space not just functional, but also inspiring and tranquil.
Ambiance and Design: Creating a Calming Pilates Oasis
One of the joys of a home Pilates studio is that you get to design a space that motivates and relaxes you at the same time. Setting the right ambiance can make your workouts more enjoyable and keep you coming back. Here are some home Pilates room ideas to create a calming, inviting atmosphere:
Choose calming colors and decor: The design of your Pilates studio at home should reflect a sense of calm and focus. Neutral or soft colors on the walls (think whites, grays, soft blues or greens) can promote tranquility. You might paint your corner or room in a soothing tone or simply add accessories in that color scheme. Consider adding a bit of greenery – a potted plant or two can bring life into the space and purify the air. According to interior designers, incorporating calming paint colors and some lush greenery can transform your workout area into a serene oasis. You don’t need to go overboard; even a small snake plant or fern on a shelf can add a touch of nature. If you have a dedicated room, you could even hang an inspirational quote or a piece of art that makes you feel happy and motivated.
Lighting matters: Aim for good lighting that energizes you during workouts but also soothes you during cooldowns. Natural light is fantastic – positioning your mat or reformer near a window can lift your mood (plus you can gaze outside during stretches). If your space lacks natural light, invest in adequate artificial lighting. Overhead lights alone might be harsh; try adding a floor lamp or table lamp with a soft white bulb to create a warm glow. Dimmable lights are even better, as you can brighten things up for an invigorating morning session or dim them for an evening stretch routine. Some people add LED candles or salt lamps for a gentle ambiance. Just be sure the area is still well-lit enough that you can see your alignment and avoid strain.
Mirrors: We mentioned mirrors for small spaces, and they’re great for ambiance too. A large mirror (or a couple of mirrored panels) on the wall will make your home Pilates studio feel like a professional space. It helps you check your form – for example, you can ensure your spine is neutral or your shoulders are down – which is important since you may not have an instructor there to cue you. Additionally, mirrors reflect light and make any room feel bigger and brighter. If wall-mounting a mirror isn’t an option, a portable standing mirror could work. Place it where you can see at least most of your body while you’re on the mat or reformer.
Minimalist and uncluttered: Clutter can be distracting and even stressful. Try to keep your Pilates area simple and clean. Store props and extra gear out of sight (in a basket, cabinet, or closet nearby) when not in use, so you’re not staring at a pile of stuff. A clean visual environment helps you clear your mind and focus on mindful movement. Perhaps roll up your mat and put it in a corner or hang it on a hook post-workout, rather than leaving it in the middle of the floor. Tidying up after each session also ensures the space is ready for next time – there’s something very inviting about a neat, dedicated spot that’s always set for you to begin your practice.
Personal touches: Make the space your own sanctuary. Since it’s your home, you can add personal touches that a public studio might not have. Maybe that’s a diffuser with calming essential oils (lavender before a relaxing evening stretch, or an uplifting citrus in the morning), or a Bluetooth speaker to play your favorite music or Pilates class audio. You could place a small altar with a candle or some inspiring objects that center you. If you enjoy a spa-like vibe, add some rolled towels and a scented candle (just practice fire safety!). If you prefer high-energy, maybe put up a poster of someone who inspires you or a vision board of your fitness goals. The idea is to create a positive mood that draws you in. Everything in the space should serve a purpose – either functional or mood-enhancing. That way, nothing feels out of place.
When designing your home Pilates studio, think of it as crafting a mini-retreat for yourself. You want to step into that area and immediately feel at ease and motivated. Little details like a soft rug underfoot, a gentle color palette, and having all your equipment neatly arranged can make a big difference. Even if your “studio” is just a section of another room, you can still decorate that section in a way that sets it apart (for example, hang a special art piece or use a different wall color behind your Pilates area). Be creative and have fun with it – after all, this space is for you. If you need inspiration, browse images of pilates home studios or small home gym setups online to gather ideas, or check out examples from interior design sites. The goal is an environment that feels peaceful but energizing, organized but not sterile. When you achieve that, you’ll actually look forward to your workouts because you get to spend time in your lovely home studio.

Maintaining Your Home Pilates Studio & Staying Motivated
Once your home Pilates space is set up, you’ll want to keep it in great condition and make the most of it. Here are some tips on caring for your equipment and yourself, to ensure your pilates home studio remains safe, clean, and inspiring:
Cleaning and care: Regular maintenance will prolong the life of your equipment. After each session, wipe down your mat and props – a gentle cleaner or simply water with a few drops of mild dish soap works for most mats (check manufacturer instructions). Wipe away sweat and oils to keep everything hygienic. If you have a reformer or any apparatus with upholstery, use a soft cloth to wipe the carriage pad, straps, and handles. It’s a good idea to do a deeper clean weekly: vacuum or sweep the floor under your workout area (especially if you roll around on the mat – you don’t want dust bunnies clinging to you!), and periodically disinfect mats and accessories with an appropriate cleaner. Also, keep an eye on your equipment’s condition: for reformers, check the springs and ropes periodically for any signs of wear (replace them as recommended by the manufacturer). For bands, check for any small tears and replace if stretched out or fraying to avoid snaps. We’ve put together a handy Equipment Cleaning and Maintenance guide that covers how to clean everything from mats to reformer rails – following those tips will ensure your gear stays in top shape.
Safety checks: Safety is important in a home gym since you’re your own supervisor. Make sure your space stays clear of hazards. Before working out, quickly scan the area – remove any stray objects (toys, furniture edges, etc.) that you could bump into. If you move furniture to make space, always put it back securely after. With equipment, ensure things are properly assembled and tightened. For example, if your reformer has foldable legs, double-check they’re locked in place before you hop on. If you attach a resistance band to something (like a door anchor), ensure it’s secure. It’s easy to get comfortable at home and skip these little checks, but treat your home studio with the same attention you would in a class. This prevents injuries and equipment damage.
Consistency & motivation: Now that you have a beautiful home Pilates setup, the next step is maintaining a consistent practice! Schedule your workouts just as you would a class – put them on your calendar. One challenge of home exercise is the lure of distractions (laundry, emails, etc.), so having a set routine can help. Perhaps you decide every morning from 7:00–7:30am is Pilates time, or you commit to three evenings a week. Write it down and treat it as an appointment with yourself. To keep things interesting, mix up your routines. You might do a core-focused mat session one day and a reformer full-body workout the next. Variety prevents boredom and plateaus. If you ever feel unsure what exercises to do, take advantage of resources: there are many online classes and videos available. Almafit offers a library of free Pilates exercise videos that you can follow along with – it’s like bringing an instructor into your home. Following guided videos can also ensure you’re doing exercises with good form, which is especially useful for beginners practicing at home.
Stay inspired: Creating a community feeling in a home studio is possible too. Consider occasionally joining live online Pilates classes or challenges on social media to engage with others. You can also keep a workout journal or use a fitness app to track your progress – seeing improvements over time (like increased flexibility or strength) will motivate you to continue. Don’t forget to celebrate your consistency! Maybe reward yourself with a new prop or a fresh pair of workout leggings after you hit a milestone of sessions. Also, listen to your body – one benefit of a home studio is you can tailor everything to how you feel each day. Take rest days when needed, and use your Pilates space for restorative sessions (even meditation or yoga) on lighter days. The important thing is to keep the momentum. You’ve made the effort to set up this wonderful Pilates home gym for yourself, so make it a regular part of your lifestyle.
By maintaining your equipment and nurturing your own commitment, your home Pilates studio will continue to serve you for years to come. There’s something empowering about having your own space where you can practice mindful movement whenever you want. As you step into your Pilates corner regularly, you’ll likely find not only physical benefits (strength, flexibility, better posture) but also mental ones – many people find that even 20 minutes of Pilates at home clears their head and reduces stress. In the long run, the consistency you cultivate in your home practice can lead to profound results (remember the famous Pilates promise: “In 10 sessions you’ll feel the difference, in 20 you’ll see the difference, in 30 you’ll have a new body”). So keep it up, keep it clean, and keep it fun.
Your home studio journey: To wrap up, setting up a home Pilates studio is a personal and rewarding project. You’ve planned your space, equipped it with the essentials, optimized it for small-space living, and added your own flair. Now it’s time to enjoy it! Embrace the convenience – no commute, no schedule conflicts, and an environment tailored just for you. As Pilates participation continues to grow nationwide, you’re part of a big movement of people taking charge of their wellness at home. With each session, you’re investing in your health and happiness. So unroll that mat or hop on that reformer, and savor the freedom of doing Pilates on your own terms. We at Almafit are excited for you and here to support you every step of the way on your Pilates journey. Now, take a deep breath, center yourself, and enjoy your workout – your very own Pilates oasis is ready for you!
Happy moving, and may your home Pilates studio bring you strength, balance, and joy for years to come!
Share:
Reformer Pilates vs Mat Pilates: Which Is Right for You?
Pilates for Beginners at Home